Author: xPal EuroCuisineLady

  • Starting August 13: Our site upgrades

    Starting August 13: Our site upgrades

    EuropeanCuisines.com has been in need of a look-and-feel upgrade for some time, and we're finally ready to begin.

    Starting around 0900 UK/Irish Summer Time on Monday, August 13, 2018, EuropeanCuisines.com will be closed for 24-36 hours while we install a new, more mobile-friendly theme. All original materials will remain in their usual locations, but the overall presentation will be much brighter and more open, and the site will become much more mobile-friendly.

    There are still a lot of things that will require adjustment over the next couple of weeks, including the repair of broken links, removal of dead ones, and reassignment of some posts and articles to new categories. To help us get this work done, the site will be down at intervals during the following week — usually between 0400 and 0900 (US) EDT — while we install and test features that cannot be tested offline.

    This is just the first of a. number of changes that will be coming to EuropeanCuisines.com during the next year. Meanwhile, thanks very much for your patience while we start reinventing our site!


  • England: Mrs. De Salis’s Cheese Straws

    England: Mrs. De Salis’s Cheese Straws

    In 2010 or thereabouts, a tiny little cookbook came to us via EuroCuisineGuy’s Mum and immediately became a household favorite.

    It was published in 1903 for what was the first generation of middle-to-upper class British housewives who couldn’t afford to hire kitchen staff, but still wanted to serve food suitable to a high-class household. These cooks were also beginning to come into possession of the first generation of true labor-saving devices — the initial gas and electric ranges, the first refrigerators — and were looking for recipes to take advantage of them.

    So along came Harriet DeSalis, and with this group of readers in mind, wrote Savouries A La Mode. The cookbook was a huge hit — no surprise, when the recipes worked so well. Dipping into it, one finds recipes that make the mouth water and make the chronic cook (at least this one) itch to get into the kitchen and see how they turn out. It became the first of a series that went on well into the early part of the 20th century and sold hundreds of thousands of copies over numerous editions.

    They’re all in public domain now, those original editions of Savouries and its sequels, which is what moved me to scan that first book and make it available . But the other reason I scanned it was so I don’t have to hunt down the cookbook proper, when the urge strikes, but can just load the PDF onto the iPad and work from that in the kitchen.

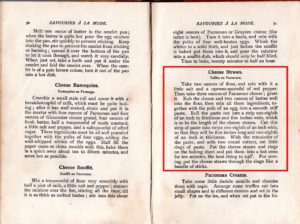
    The other evening I was feeling like having some kind of snack, and it occurred to me to pull out the DeSalis and see if we had the ingredients for anything that looked nice. Paging through it, I ran into the Cheese Straws recipe, and the bells went off and I salivated on cue. Here’s the recipe.

    “Take two ounces of flour, and mix with it a little salt and a cayenne-spoonful of red pepper. Then take three ounces of Parmesan cheese: grate it. Rub the cheese and two ounces of butter well into the flour, then mix all these ingredients, together with the yolk of an egg, into a smooth stiff paste. Roll the paste out into a strip one-eighth of an inch in thickness and five inches wide, which is to be the length of the cheese straws. Cut this strip into strips one-eighth of an inch wide, so that they will be five inches long and one-eighth of an inch in thickness. With the remainder of the paste, and with two round cutters, cut little rings of paste. Put the cheese straws and rings on a baking sheet and put them into a hot oven for ten minutes, the heat rising to 246 degrees. For serving, put the cheese straws through the ring like a bundle of sticks.”

    So. My first thought: God that looks fiddly. But never mind. Also: Forget about the little rings, this isn’t going to be a dinner party. The second (okay, maybe the third) thought: We don’t have any Parmesan: only Cheddar. …Like I’ve ever let that stop me. (An old allergy put me off Parmesan early, and these days, though no longer allergic, I avoid it.)

    So I went forward with the same amount of Cheddar, knowing that the mixture would be a little wetter due to the Cheddar’s extra moisture, and I’d need to compensate with slightly longer baking. What I learned in the process of making these:

    • The whole thing can be done in the Cuisinart / Magimix, which simplifies matters considerably. I grated the cheese separately on a microplane grater, then buzzed the flour/cayenne mixture together using the steel blade in the small bowl of the Cuisinart; then dumped its contents into the big bowl, whizzed everything together with the cheese, added the two egg yolks and pulsed until the whole business gathered together. If you’re going this route, don’t overdo the pulsing, as you don’t want the mixture to toughen up.
    • 1 egg yolk wasn’t enough for our local flour to cohere: I wound up using two.
    • I’d never heard of a “cayenne spoon” until I saw this recipe. There are pictures of them at Google (click here) and you know what? They’re all too small for me. We like our cayenne around here. I put in a teaspoonful. (Peter noted that you could probably get away with using chili powder if you were of a sensitive disposition.)
    • 1/8 inch is indeed very fiddly. I wound up cutting my straws / sticks to more like 1/6 or sometimes 1/4 inch, and that worked out fine.
    • I put baking parchment under these to make sure they wouldn’t stick. It turns out to be a good idea, as melting butter bubbles out of them at the edges when they’re baking.
    • Ten minutes was way too long a baking time, and the oven temperature takes some fiddling with as well. I have no idea what Mrs. De S. means by “rising to…”. I wound up putting these in the oven at 170 C / 350F for about 5 to 7 minutes (as our oven retains heat during multiple bakes, so they needed less time as I went on). Your mileage will almost certainly vary. Experiment with a small batch to see how you get on.

    …And that’s all there is to it. The straws were incredibly delicate and buttery due to the very short pastry — but the cheese is great in them and the cayenne gives them a terrific kick. The whole bake lasted through about twenty minutes of the first Hobbit movie. Peter tells me they work as well with beer as mine did with that red wine.

    Try them and see how they work out for you. And mind your baking times, as the Secretary and I will disavow any knowledge of your actions if the sneaky little creatures burn to a crisp between one minute and the next. (Like my first batch did.) Do a small batch first and watch them like a hawk. Save

  • France: Gougere

    France: Gougere

    In (of all places) the "Desserts" chapter of his seminal cookbook Simple French Food*, the great food writer Richard Olney casually drops this recipe onto the page for your consideration, buried in an introductory paragraph for a recipe for Pets de Nonnes or "Nuns' Farts". The concept of savory choux-paste buns, he says, comes originally from Burgundy

    Wherever it comes from, it absolutely works. Crispy on the outside, delicately textured on the inside and gooey with melted cheese, and with a spicy kick of cayenne to top it all off, gougére is one of the very best things to have with wine, and it's quick and easy to make.

    First of all, you'll need:

    • 4 eggs

    Take them out of the fridge and leave them out for an hour or so to come up to room temperature.

    When they're warmed up, preheat your oven to 200 degrees C / 400 degrees F, and find a nonstick baking sheet or prepare a regular one with a sheet of baking parchment. (Or you can just grease it lightly or dust it with non-stick spray.)

    Then gather your other ingredients:

    • 125g / 4 ounces flour
    • 250 ml / 8 fluid ounces water
    • 75 g / 2 1/2 ounces butter
    • Pinch of salt
    • 200g / 6 ounces Gruyere or Emmenthal cheese, cut into tiny cubes (1/3 – 1/4 inch across)
    • 1/4 – 1/2 tsp of cayenne or chili powder, to taste and for garnish
    • 1/8 tsp of coarse salt to garnish

    Cube the cheese and set it aside. Measure out the other ingredients and have them ready (as you're not going to have time for this when you actually start making the dish). Also have ready a wooden spoon or other heavy stirring spoon that's comfortable in your hand, because you're about to do several minutes of heavy-duty mixing.

    The heart of this recipe is the pâte à choux or choux paste. This is the secret behind éclairs, profiteroles and many other sweet treats from the French patisserie repertoire. It's easy to be a little intimidated by the concept, but once you've made it yourself and seen how easy and quick it is to make, you won't be bothered by choux paste's reputation any more.

    First: Find a heavy-bottomed saucepan, put the water in it, salt the water and bring it to a boil.

    Once it's boiling, add the butter. Boil until the butter is completely melted.

    Now pull the pan off the heat and throw in the flour, all at once. Start stirring, hard, until it's all incorporated. Then put the pan back on the heat and keep stirring hard. You want to get this mixture to the point where it pulls away from the sides of the pan and gathers together in a sort of clump or ball. (Olney says that you're looking for that ball to have a "sweaty, shiny aspect.")

    Pull the pan off the heat again. Squish the ball of paste down with the spoon to create a sort of well in it, and crack in the first egg (or slide it in if you've cracked your eggs beforehand). Start beating the mixture again until the egg has become completely combined with it. Don't dawdle over this, as you're counting on the residual heat in the pot and the paste to cook the eggs. Add the next egg and repeat the process: and the next, and then the final egg.

    When all the eggs have been combined into the choux paste, quickly stir in about three-quarters of the cubed cheese and almost all of whatever seasoning you've chosen. (Cayenne is more traditional: paprika will work too if you prefer a slightly milder version of the gougére.)

    There are now a couple of different ways to proceed. The traditional one is to make a ring of gougére puffs on the baking sheet, by dropping big spoonfuls of the paste mixture onto it in a circle. But you can create separate puffs if you prefer. (Be aware that separate puffs may bake a little more quickly, so you'll need to keep an eye on them in the oven if you opt for this method.) If you feel like going to this much trouble, you can also pipe the gougére mixture onto the baking sheet if you have a piping nozzle big enough to pass any cheese cubes that haven't melted from the heat of the choux paste.

    In any case, once the mixture has been spooned or piped onto the baking sheet in whatever configuration you prefer, scatter the remaining cheese cubes over the ring or puffs and press them in gently. Then dust with the remaining cayenne, paprika or chili powder. Finally sprinkle a little coarse salt over the gougére.

    When all this has been done, get your gougére into the oven. The "ring" form of gougére is normally baked for about 40 minutes in a conventional oven. (It might be more like 30 or 35 minutes if you have a fan oven: keep your eyes open for signs of scorching.) Single puffs also may take only 30 minutes or so — the smaller they are, the less time they'll take.

    At the end of your baking time, the gougére will have gone a glossy toasty brown. Put it on a rack to cool just briefly. Then pull it apart and enjoy with wine. (Or other beverages, of course… but wine with these is sublime.)

    (Wow, there's also a Kindle edition of this. Who knew.)

  • Griddle baked soda bread

    Shaping "farl" soda bread

    With a very sharp knife, slice the circle of dough into four wedges. Try not to crush or compress the dough where you cut it (if the knife is sharp enough, you won't).

    Baking farl on the griddle

    Dust the hot griddle or frying pan with a very little flour, and put the farls on/in gently. The cut edges should be 1/2 inch or so apart to allow for expansion. Give the farls 20 minutes on a side. They should be a sort of mocha-toasty color before you turn them. Keep an eye on the heat — they scorch easily. When finished, take the farls off the heat and wrap them in a light dishtowel, hot side down. (The residual steam works its way up through the soda bread and softens the crust formed by the process of baking on the griddle, making it more amenable to being split and toasted later.)

    Both ways, the soda bread is wonderful sliced or split and served hot, with sweet butter and/or the jam or jelly of your choice.

    Soda farl is also one of the most important ingredients of the Ulster Fry, the world's most dangerous breakfast (nothing whatsoever to do with its area of origin: it's the cholesterol that comes with frying sausage and bacon and black pudding and soda bread and, and, and…). Click here for the Ulster Fry recipe.

  • Ireland: Irish Whiskey Cake

    Ireland: Irish Whiskey Cake


    In Ireland, when the cold weather sets in — and it's usually wet as well — a lot of people, when they turn up at their local pub, really want something hot to take the chill off them. One of the great classic Irish drinks for this purpose is the "hot whiskey".

    This is more than just whiskey. It's a slice of lemon with cloves stuck in it, dropped into a heatproof glass with a big shot of whiskey and a big spoonful of sugar or honey. Then the whole business is topped up with boiling water. To have one of these set down in front of you after coming in from the cold is a moment of true joy.

    Our Irish whiskey cake — or "hot whiskey cake" as the neighbors call it — is meant to recall the drink in the same way that our Irish Coffee Cake recalls its name-drink. The cake itself is a classic Irish madeira cake — one originally designed to have alcohol poured onto / into it after baking. The lemony layers are the perfect foil for the warm, tart-sweet lemon syrup they're soaked in — scented with cloves and laced with Irish whiskey, to give the cake that real "hot whiskey" flavor. A lemon-and-whiskey glaze tops the whole thing off.

    We used 9-inch pans to bake our example, but since these layers don't rise incredibly high, you can bake the cake in 8-inch layers if you like. Add 5 minutes to the baking time if you do, as they'll naturally be a bit thicker than the 9-inch versions.

    Please note that this is not one of those showpiece cakes… not terribly photogenic, no matter what you do to it. It just tastes good.

    Ingredients:

    For the cake:

    • 140g / 5 ounces / 3/4 cup butter
    • 220g / 1/2 lb / 1 1/4 cups granulated sugar / caster sugar
    • 440g / 1 lb / 3 1/2 cups cake flour / cream flour
    • 2 teaspoons baking powder
    • 1/4 tsp salt
    • Finely grated rind of 1 lemon
    • 2 tablespoons fresh lemon juice
    • 1/8 teaspoon ground / powdered cloves
    • 3 large eggs
    • 100ml / 3/4 cup milk
    • Also: butter for the cake pans
    • And baking parchment to make it easier to move the layers around after soaking them with the syrup (and for prepping the springform pan if you want to use one in the cake's assembly)

    For the lemon and whiskey syrup:

    • 150 ml / 3/4 cup water
    • Finely grated rind of one lemon
    • 150 ml / 3/4 cup lemon juice (the juice of the lemon whose rind you just grated off, and enough extra lemon juice to make 150 ml / 3/4 cup. Bottled lemon juice is OK if you prefer to use that to arrive at the correct amount, but of course fresh-squeezed is always better)
    • 4 whole cloves
    • 240 g / 1 1/2 cups caster sugar / granulated sugar
    • 6 tablespoons Irish whiskey

    For the glaze:

    • 400g / 14 oz / 3 cups confectioners' sugar / icing sugar, sieved
    • 2-3 tablespoons lemon juice (preferably fresh)
    • 2-3 tablespoons Irish whiskey

    Please note before you start that the basic recipe for the cake layers produces a very firm and somewhat dry cake. This is intentional: it's going to be very thoroughly soaked with almost half a liter of whiskey-laced syrup, and needs to be able to maintain its structural integrity during the process. A softer or moister cake would simply disintegrate once soaked.

    To make the cake:  Preheat the oven to 190° C / 375° F. Butter well two 8- or 9-inch cake pans: then line their bottoms with baking parchment and butter the parchment as well. (As mentioned above, if you have a springform pan of the same size as the pans you're baking in, make it ready by cutting a baking parchment circle to cover the (buttered) bottom: then butter over this.)

    Cream the butter and sugar very well until light and fluffy: then add the eggs one at a time and continue beating after each until the whole mixture becomes very light. Before adding the last egg, add a spoonful of flour to the batter. Once all the eggs have been beaten in, slow down the beater and add the lemon juice and ground cloves. Sieve the flour, baking powder and salt together very well; then at low speed with the mixer, or by hand if you prefer, add the mixture by spoonfuls to the batter, alternating with the milk, and mix gently until well combined.

    Spoon the batter into two 9-inch cake pans / tins (or 8-inch if you prefer). Smooth the top of the batter, leveling it out. (This batter will be very firm, and may be a little reluctant to spread. Don't panic: this is the way it's supposed to be.)

    Bake the layers for 35-40 minutes (check them at 30 minutes if you're using a fan oven: they may be done at that point), until the cake is just starting to pull away from the sides of the cake pans. Remove from oven and allow the cake layers to cool in their pans for ten or fifteen minutes. Then carefully turn the layers out onto a rack to cool. When they're out, wash and dry the cake pans. You'll need them again shortly.

    To make the syrup: Heat the water, lemon juice, grated lemon rind and cloves together gently for 15-20 minutes (the mixture should just be steaming at this point, not boiling). Add the sugar and bring to a boil, stirring constantly until the sugar is completely dissolved. Then boil rapidly for 4 minutes. (Make sure you do this in a pan at least three times the size of the syrup, because it will try to boil over, and it'll leave you with an incredible mess if it gets all over the cooktop.) Remove the pan from the heat and allow to cool for five minutes or so. Then remove and discard the cloves, and stir in the whiskey.

    Now put a piece of baking parchment in the bottom of each layer pan, covering the bottom of it as completely as possible and overlapping the sides so that enough sticks up for you to easily pull the cake layer out of the pan. Then return the cooled cake layers to their pans. Use a skewer to poke concentric circles of holes into the top of each layer, being as careful as you can not to go all the way through the layer and out the bottom. Then slowly pour half the lemon-and-whiskey syrup over each layer, alternating pours so that each one gets the same amount, and leave the layers to soak in the syrup for 2-3 hours.

    To make the filling / glaze: Measure the confectioners' sugar into a mixing bowl, add the lemon juice and whiskey, and beat very well together. The consistency should be such that when it's been well beaten, the glaze should be pourable. 

    Put the bottom layer of your cake on a serving plate and drizzle the top of it well with about a third of the glaze in a very thin stream, crisscrossing it so as to cover as much of the surface as possible. Place the second layer on top and press it down firmly onto the bottom one: then use the remaining 2/3 of the glaze to do a similar crisscross pattern on top. Allow about ten or fifteen minutes to let the glaze set before handling the cake any further.

    Slice and serve. Some people like to put slices of the cake in the microwave for thirty seconds or so, and serve it warm.

    A final note: All told, there is nearly 175ml of Irish whiskey in this cake — the equivalent of nearly four Irish bar measures of whiskey (or 2 doubles). Maybe we're just being overcautious, but it seems unwise to drive after you've had more than a slice of this: there might be enough alcohol in it to produce a false positive on a test and get you in trouble with the local constabulary, and no one wants that. So, a word to the wise… hang the car keys up first.

  • France: Coeur de boeuf a la Tripieres

    France: Coeur de boeuf a la Tripieres

    In good economic times, people tend to turn their backs on foods that remind them of leaner periods. But when life gets more financially challenging, people start getting interested again in "variety meats" like oxtail, whole tongue, kidneys, and heart.

    Too many people have this image of heart as something vaguely icky and wobbly. This is just silly. Heart is a muscle meat, like steak: just a whole lot harder-working. Or else people think of it as something incredibly tough. Often this is the result of having eaten heart cooked by someone who didn't know how to treat it. Like oxtail and shin, it comes from a hard-working part of the cow, and like them, it needs long slow cooking to bring out its best. But when handled properly its flavor compares favorably with theirs, or surpasses them.

    Our recipe comes from a surprising source: the ancient Minitel "site" of a tripe butchers' association in France, which EuroCuisineLady stumbled across decades back when Ireland was having a brief flirtation with the Minitel system. The site of "Les Societé Anonyme des Tripiers* de wherever" had a recipe section: and hidden there was one of the best treatments for heart ever seen. It being France, much red wine is involved. (Surprise, surprise.)

    Ingredients:

    • 1 beef heart
    • 1 bottle rough red wine (Rioja, Bordeaux or similar)
    • 6 cloves garlic (a whole head if the cloves are small), peeled and chopped or just smashed, as you prefer
    • 2 large onions (red, golden or white, it doesn't seem to matter)
    • 1/2 – 3/4 pound smoky bacon, sliced, the slices roughly chopped up (if you bacon has rinds, you can safely leave them on for this recipe)
    • A few tablespoons of oil for sauteeing
    • Coarse ground salt (or a few pinches of regular salt if you don't have a grinder)
    • Coarse ground pepper
    • Bouquet garni (thyme, sage, parsley, a little rosemary)
    • Optional: a few pink peppercorns, a few pinches of chili flakes

    A note regarding the wine: You don't need anything fancy. Chianti is a good choice, but anything cheap and rough will work perfectly well. Last time we did this recipe, the wine was a Rioja, because EuroCuisineLady couldn't find a Chianti that looked cheap and muscular enough. This time, while EuroCuisineLady was at the butcher's, EuroCuisineGuy went off and came back with an inexpensive Bordeaux, which worked beautifully.

    So the first thing you need to do is prep the beef heart. This may sound daunting if you've never done it, but it only takes ten or fifteen minutes and isn't difficult. It also is not going to be particularly gory: nowhere near as bad as your average episode of CSI, anyway. Use a boning knife or whatever thin, very sharp knife you find most convenient.

    First, trim off any exterior fat from the heart: you won't want that in the final product.

    Once the outside of the heart is trimmed, slice straight though the heart and lay it out open in two pieces. At this point some people like to cut away the outer skin of the heart entirely, but this seems like an overreaction to EuroCuisineLady, as — once everything is cooked — even without the trimming you're not going to be able to tell the pieces that come from the outside layer of the heart from the ones that come from the inside. If you do want to do this, though, push the outside of the heart flat down against the cutting board and use the boning knife on it the same way you'd use it to remove the skin from the outside of a fish filet. (Depending on your knife and your skill, you may find it easier to cut the heart into two or three pieces, the long way — top to bottom — and operate on each of them separately.)

    Next: tidy up the inside of the heart. There will be the occasional tube-y looking bit in there — cut these away if you come across them — and some stringy-looking ligaments inside. Cut these away too. There is some shiny membrane inside the chambers of the heart (nature makes the inside of the heart very "nonstick" so as not to harm the delicate red blood cells on their way through), and you can either trim this membrane away or not, just as you please: again, you won't notice it when the dish is finished. You may also find a hard bony-feeling bit up near the top of the heart: cut this away if it's there.

    Once the membranes have been removed, slice each chunk of heart muscle into cubes or cubish bits, half an inch wide or so. You should wind up with at least a pound and a half or two pounds of perfectly lean, dark red meat.

    Put them in a glass or other nonreactive bowl.

    Now we start the marinade. Add:

    • Most of the bottle of wine, enough to cover
    • The peeled, chopped or smashed garlic cloves
    • The herbs. If you have fresh ones available, they're always best: otherwise use dried ones, or add a storebought bouquet garni.
    • A few grinds of salt and a few grinds of coarseground pepper: if you're using them, add the pink peppercorns and the chili flakes.

    Stir the whole business together, cover with plastic wrap, and put in the fridge to marinate for at least 24 hours. 48 is better if you've got that much time to spare. The more time the meat can spend in the marinade, the more tender and flavorful it will be after cooking.

    On cooking day: please note that the prep and total cooking time for this dish can vary from 4-5 hours: so if dinnertime is closer than that, wait a day.

    When you're ready to start cooking:

    Chop up the smoked bacon as large or small as you like (no larger than the heart pieces, but smaller if you choose). In the heaviest large, tight-lidded casserole you have, sauté the bacon in a little oil (olive oil works fine for this). Don't do this on too high a heat: you just want the bacon fat to run.

    Peel and chop the onions. Sauté them slowly with the bacon until they start to go brown.

    Once they've browned a little, add the heart and its marinade. Season with a little more salt and pepper. If necessary, add enough more red wine to cover the meat.

    Get a small sheet of aluminum foil, enough to cover the open pot, and then put your lid down on top of it and press well until it's securely sealed. Put the pot into a slow oven (250°F / 120°C) and leave it there for three to four hours.

    At the three-hour point, open the pot and check a little of the meat for tenderness. If you feel it could be a little more tender, put it back in the oven — add more wine to top up, if you feel the need — and give it another hour or hour and a half.

    When the meat is tender enough for you, take the pot out of the oven, spoon the meat out of it, and thicken the gravy.You can simply pour the cooking juices into another pot and boil them until they reduce and thicken. Or you can make a roux of a couple of tablespoons of flour and a few tablespoons of butter in another pan (by frying the flour and butter together until the roux goes golden); when the roux is ready, take it off the heat, let it cool a bit, add the gravy juices to the roux, and boil everything together until it thickens.

    When it's ready to serve: Mashed potatoes (as in our image above) are a natural choice to soak up the gravy. EuroCuisineGuy likes dumplings, or sometimes egg noodles. You might even try spaetzle. A green salad goes well on the side. And perhaps a glass of red wine…

    *In France, a tripier doesn't just deal in tripe, but in the whole range of variety meats: they not only sell them, but often prepare and cook them as well, offering them as take-home ready meals.

  • Scotland: Haggis

    Scotland: Haggis

    As January 25th draws near and Burns Night starts to approach, a lot of people with Scots ancestry start thinking about haggis. There are, of course, lots of folks who'll run screaming in the opposite direction at the very mention of the word, freaked out by the thought of unmentionable wobbly organ meats. Well, to each his or her own.

    Haggis is simply an outsized country sausage, made — as country sausages tended to be in previous centuries — out of the parts of various animals which rich, snooty or fashionably squeamish people were too highfalutin' to be caught eating, no matter how good the final result tasted. Haggis includes the "pluck" of an animal — its liver, heart and lungs: from this usage comes the adjective "plucky", meaning someone who has (surprise) guts. The phrase "liver and lights" (see also "I'll punch his lights out") is also associated with haggis, the lights being the lungs.

    Haggis also usually involves something to bulk the meat content out — usually suet and oats or oatmeal — and is seasoned with onions, stock, salt and various spices. The meats having been cleaned, trimmed, and chopped, and mixed together with the oatmeal, some stock, and the various seasonings, the whole business is then packed into a casing. Traditionally this would have been a sheep's stomach: nowadays it's as likely to be an artificial casing of some kind.

    The haggis is then ready to be cooked. This means simmering it slowly for two or three hours in water or stock. At a Burns Night ceremony, the haggis is served forth with great ceremony, often accompanied into the dining room by the skirl of pipes. It is courteously saluted with a recitation of Burns's great Address to a Haggis before being sliced up and served with the traditional accompaniments — neeps and tatties (mashed turnips and potatoes), and Scotch whiskey… often quite a lot of it, sometimes used as a distraction by those who like Robert Burns more than they like the haggis.

    Seriously, it's not so terrible. Visitors to Scotland who visit a well-provided breakfast buffet at their hotel are likely to find sliced haggis there along with the bacon and fried mushrooms and other traditional Scots breakfast foods. It's particularly good fried (as so many things tend to become in Scotland, sometimes without warning, or indeed without any detectable reason. Whose idea was the deep-fried Mars Bar?). If anything, it's a little bland, and a dash of Tabasco does it no harm at all. Possibly this is why "designer" haggises, such as haggises based on smoked venison, are starting to turn up. There are also vegetarian haggises available.)

    Read on for details on how to order a haggis for your Burns Night, and how to deal with it after you've got it.

    …If you're thinking of conducting a Burns Night and have been having trouble locating a haggis locally, you will probably be happy to know that there are numerous places where you can order them online. US / North American would-be haggis cooks can order the Chieftain of the Pudding Race at The McKean Family of Haggis website. (Apparently you must email them at scottishhaggis@maine.rr.com.) You should note, however, that the USDA has decided that sheep's lungs/lights are not fit for human consumption (and in the US, they may not be), so any haggis imported into the US from the UK will be missing this ingredient.

    UK and European readers can order the haggis online from a number of places. One is the McKean family website mentioned above. Another good-looking source for UK readers is Blackface.co.uk: their haggis comes with the endorsement of River Cottage's famous Hugh Fearnley Whittingstall. There is also the award-winning haggis from Findlays of Portobello, which has British TV chef Ainsley Herriot as its champion. Also good for UK and European Union readers is Scottish Food Overseas, featuring haggises from MacSweens of Edinburgh.

    For those of you who live near a cooperative butcher and can actually acquire the necessary bits and pieces yourselves, the BBC offers this recipe for haggis from scratch. Additionally, Tom Kreitzberg's haggis page has a number of recipes, suggested cookbooks, and other info. …On the lighter side, don't miss the Scotsman newspaper's Haggis Hunt pages, including the Haggisclopedia. (Not to mention the HaggisCams.)

  • France: Galette des Rois / Three Kings’ Cake

    France: Galette des Rois / Three Kings’ Cake

    All through Europe traditions of a time of cheerful mischief and "misrule" after Christmas abound — memories of the role reversals that were part of the ancient Roman solstice feast of Saturnalia. Right down to our modern day, memories of this annual crazy time are preserved…sometimes in the food. Each year for ten days the social tables would be turned: slaves dressed up in their masters' fine clothes, ordering them around and assuming the trappings of wealth and power while the festival lasted. With the coming of Christianity, some of these upset-the-status-quo traditions attached themselves to the Feast of the Epiphany on January 6th, the commemoration of the arrival of the Three Wise Men with their gifts at the birthplace of the Christ Child. And one of these is the making and eating of the Galette des Rois.

    The kings referred to in the name Galette de rois are naturally the Three Kings of the Epiphany feast. But there's nothing particularly religious about the cake itself. Its connection with the old Misrule celebrations becomes obvious when you discover that it's baked with a small favor hidden inside it: the person who gets the favor in their slice of the galette is proclaimed King or Queen of the party where the galette is eaten, and gets to wear the gold paper crown that comes with the cake when you buy it.

    Originally the prize baked into the galette was a fève or bean, again recalling the black and white beans that the Romans used to choose the King of the Saturnalia celebrations. But these days the favors are usually a lot  fancier, and wildly varied —

    — ranging from Harry Potter, the Simpsons, Asterix, Babar and Lord of the Rings to cats, dogs, old cars, Kings and Queens, writers, philosophers, flowers and plants, household utensils, articles of clothing, Nativity figures, saints, Popes, nautical instruments, positions from the Kama Sutra, musical instruments and shoes.

    Some bakers do a different collectible fève each year, and they vie with other local bakers to do the coolest or most expensive favors — for example, one Parisian patissier has been doing favors made of Swarovski crystal. Other galette makers have taken to inserting one very high-value fève into a large run of galettes, so that if you get lucky you might come across a golden one, or a fève with a diamond in it. But whether they're made of valuable materials or not, fèves are very collectible; online you can find sales sites,  professional suppliers, fève-fan associations, and even the annual fève collectors' convention. 

    The Galette itself is extremely seasonal. It's meant to be eaten first on January 6th, but it starts appearing in French patisseries right after New Year's, and remains available until February 2nd, the Feast of Candlemas. In every big French town there's fierce competition to be known as the baker or patissier who makes the best galette des rois, and while the Christmas season is still in full swing, the newspapers are already investigating who'll have the best galette in town this year.

    There are regional variations: the southern galettes tend to be more cakelike. The most famous one, the galette des rois that's popular in the Paris region, is fairly simple from the baker's point of view: it's frangipane (a mixture of almond cream and creme patissiere) enclosed in an outer casing of puff pastry, then baked. Our recipe is an adaptation of one from Parisian patissier Stéphane Vandermeersch, who routinely comes up on the "top ten" lists as the maker of some of the best galettes des rois in the City of Lights.

    The recipe may look long and complicated, but don't let its length put you off: it's simpler than it seems. You start out by making the creme patissiere and the almond cream. Then you roll out the puff pastry and refrigerate it to make it easier to handle. Finally you assemble the cake, refrigerate it for a little while more, and bake it.

    For the outside of the galette you'll need:

    • 14 ounces all-butter puff pastry, homemade or store bought, chilled and ready to roll

    For the frangipane filling:

    • 3/4 cup almond cream and
    • 1/4 cup pastry cream (the recipes for both of these follow.)

    To flavor the filling:

    • 1 tablespoon dark rum

    To glaze the puff pastry and glue together the pastry layers:

    • 1 large egg 

    And to hide in the galette:

    • 1 oven-safe trinket about an inch long (French regulations specify that no feve can be more than 1.04 inches in length).

    First, make the creme patissiere. The ingredients are:

    • 2 cups whole milk
    • 1 vanilla bean, split and scraped
    • 6 large egg yolks
    • 1/2 cup sugar
    • 1/3 cup cornstarch, sifted
    • 3 1/2 tablespoons (1 3/4 ounces) unsalted butter, softened, separated into five or six small pieces

    One warning about this before you begin: this recipe will make about four times as much creme patissiere as you need. Unfortunately it is very difficult to make small amounts of creme patissiere, so you're kind of stuck with this situation.  The creme will keep tightly covered with plastic wrap for a couple of days, during which you can stuff a Boston cream pie with it, or use it to fill eclairs.)

    Anyway, put the milk and the vanilla bean and its scrapings into a small saucepan, and bring gently to a boil. As soon as the milk boils, get the pan off the heat, cover it, and let the vanilla infuse the milk for at least ten minutes, but preferably an hour or so. (If you let it go this long, you'll need to heat it gently again at the hour's end. This is in fact a good time to put the creme patissiere aside and make the almond cream.)

    In a larger, heavy-bottomed saucepan, whisk together very well the egg yolks, cornstarch, and sugar. Very slowly trickle in some of the hot milk (reheated if you took a break to deal with the almond cream) and keep whisking like crazy: this is to temper the eggs so that they won't seize up or scramble on you. When this initial dose of milk is well mixed with the eggs and dry ingredients, add the rest of the hot milk and keep whisking hard.

    Turn on the heat under the saucepan and keep on whisking while the creamy mixture comes to a boil. At the boiling point, the mixture will become very thick, very rapidly. Keep whisking hard and lower the heat immediately, keeping an eye on the bottom of the pan to make sure nothing is scorching. If it looks like this is starting to happen as you continue to whisk, take the pan off the heat and just keep whisking. You may not be able to keep actively boiling the mixture, but whether the pan is on the heat or off it, keep whisking for at least two minutes. Then add the butter piece by piece and keep whisking until it's all vanished into the creme patissiere. Locate and discard the remains of the vanilla pod.

    (A note here: some recipes for creme patissiere insist that you should push the finished creme patissiere through a sieve. EuroCuisineLady personally feels that you don't really need to do this unless your creme is lumpy. If you whisked it hard enough, it shoudln't be. If you're a perfectionist and want to put it through the sieve anyway, don't let us stop you.)

    Have ready a small heat- and cold-proof bowl and pour (or more likely scrape) the creme patissiere into it. Smooth some plastic wrap onto the surface of the creme (to keep a skin from forming) and put the bowl in the refrigerator to cool. (You can hasten the process by putting this bowl in a bigger one half full of cold water or ice cubes.)

    To make the almond cream, you need:

    • 6 tablespoons (3 ounces) unsalted butter at room temperature
    • 3/4 cup confectioners’ / icing sugar
    • 3/4 cup ground blanched almonds
    • 2 teaspoons all-purpose flour
    • 1 teaspoon cornstarch / cornflour
    • 1 large egg, at room temperature

    Use the small bowl of a food processor to combine the confectioners' sugar and softened butter until the two ingredients gather together into a smooth ball. Add the almonds and process them with the sugar and butter until very completely incorporated. Then add the flour and cornstarch and process together again. Finally add the egg and continue  processing until the mixture has resolved itself into a smooth cream. Refrigerate this until you're ready for it. (A side note: any leftover almond cream can be frozen and will keep there for a month or so, . Pack it into a little pot or a Zip-Loc bag, freeze it, and then when you want it defrost it in the fridge overnight; beat it when defrosted to make it creamy again.

    Now it's time to deal with the puff pastry.

    You're going to need two circles of puff pastry: one about nine inches in diameter (this will be the bottom of the galette) and one about nine and a half inches wide (this will be the top). Roll out the pastry about 1/8 inch thick (or spread out your sheets of ready-rolled puff pastry) on a lightly floured surface and use a very sharp knife to cut out the circles by tracing around an upturned bowl or cake pan of the right size for each one. Set each circle on a piece of baking parchment and put each of these on a baking sheet or other flat surface: refrigerate them for 15-20 minutes.

    When the circles are ready to come out of the fridge, combine the creme patissiere and the almond cream together to make the frangipane. Use:

    • 3/4 cup almond cream
    • 1/4 cup creme patissiere

    Mix them together gently with a fork until completely combined. (Try not to beat any air in.) Stir in the rum until it too is completely combined with the frangipane.

    Get the pastry circles out of the fridge. Crack the remaining egg into a small bowl and beat it gently. With a pastry brush, paint the outermost inch of the smaller / bottom circle with beaten egg. Carefully spoon and spread the frangipane into the center of the circle, spreading it evenly out toward the egg-painted circumference. Gently press the ovenproof token down into the frangipane, somewhere between the middle and the rim, and spread some frangipane over it, covering the token up.

    Once this is done, immediately take the larger / top circle of pastry and place it on top of the frangipane and bottom puff pastry layer. With a fork, crimp the edges of the top layer firmly down onto the egg-painted lower layer. Be thorough about this, as you do not want to allow the frangipane a chance to leak out the sides (and indeed the stuff is probably already oozing toward the edges).

    Once the edges are sealed, brush the whole top circle and the new upper edges very well with the beaten egg. Then, with a very sharp-pointed knife or even a razor blade, lightly score the top of the galette with a decorative pattern (being very very careful not to cut all the way through). This pattern can be straight lines, or curved ones radiating out from the center toward the sealed edge — whatever you like. Cut a small slit in the very middle to let out the steam that will build up during baking.

    When finished with the scoring, place the galette on a baking sheet and shove it in the refrigerator again for about half an hour. Position a rack in the center of your oven, and preheat the oven to 230C / 475F. When it's ready, put in the galette and immediately reduce the heat to 400F / 200C. Bake for forty minutes total. Check the galette around the twenty-minute mark to make sure it's not browning too fast: if it is, place a tent of foil over the galette to protect it.

    When the time is up and the galette is nicely puffed up and golden, remove and place on a baking rack to cool. Don't cut it for at least twenty minutes.


    Cutting the galette: There are a number of traditions surrounding this. (Obviously one of them is warning your dinner guests that one of their pieces of galette has a token in it, and warning them not to bite down hard on anything.  Parents will know best whether they care to include their children in sharing this tradition.) In France, as a precaution against the person cutting the galette giving the token to somebody on purpose, traditionally the youngest guest — child or adult — gets underneath the dining table, where they can't see the cutting happening, and calls out the name of the guest to whom each new slice is to be given. Whether you choose to become involved with this portion of the tradition is entirely your business.

    In any case, enjoy!

    (Additional reading: A beginning fève collector's Fete des Rois in 2011: and another overview of the Epiphany feast in France, the Galette, and the fèves.)

  • Dinner For One: Miss Sophie’s Fruit Course

    Dinner For One: Miss Sophie’s Fruit Course

    The phrase “Same procedure as last year, Miss Sophie?” makes it plain to Dinner For One fans that this particular dinner party has been re-enacted quite a few times. With this in mind — and having had to deal with the aftermath — it seems likely that Cook Downstairs eventually convinced Miss Sophie to keep things relatively simple by dispensing with the traditional British sweet course when planning her birthday dinners. This makes a certain sense, as the kind of excitement that starts setting in with the poultry course in the video wouldn’t sort well with a big bowl of trifle or one of the other great British puddings.

    We have to say “pudding” in this instance, instead of “dessert”, to conform to the formal British usage of Miss Sophie’s period. In the UK, when used casually, “pudding” can mean any kind of baked, cooked or composed sweet — what a North American would call “a dessert”. So that, for example, when in the Harry Potter books and films Luna Lovegood says “I hope there’ll be pudding”, she’s using casual Irish / British idiom to indicate that she’s interested in having some kind of sweet or sweet course in general — not a creamy mousse-like preparation that comes out of a box or from a mix. In Miss Sophie’s case, though, what would be considered the “sweet course” has been bypassed. In a formal dinner of her period, “dessert” is the name of the course that comes after the sweet course, and it always means only fruit.*

    As for what she eats: Miss Sophie rather sensibly finishes with just a light nibble or so after the three previous and fairly substantial courses. She picks a pear from the fruit bowl James offers her, and also appears to toy with a couple of grapes before the last round of toasts begins. Beyond that, there’s not much to be said except about the drinks.

    “We’ll have port with the fruit.”

    The original port wines came only from the Douro Valley in Portugal, and in the European Union only wines from that region are now allowed to be called port since the wine acquired its Protected Geographical Status: though in the US and many other countries, fortified wines made locally can legally be called port.

    Port wine as a class divides into two types: vintage port (which makes up only about two percent of all ports made) and wood port. Vintage port spends a short time aging in the barrel and then can spend many years aging in the bottle — usually at least fifteen before it’s considered ready to drink. Wood ports include all other kinds of port, but they don’t concern us, since Miss Sophie’s cellar would contain only the vintage type. (Also, as a British lady of “the quality,” Miss Sophie would be unlikely to have anything but true Portuguese-originated ports in her cellar.)

    Vintage ports are richer and more flavorful than the wood variety, and usually considerably more powerful. Many of them are blends of different ports from various estates in northern Portugal. The heavier, more complex ports are routinely suggested to accompany sweets that have pronounced flavors, like chocolate. But for fruit, it’s likely that Miss Sophie would have chosen a lighter-flavored and less complex “tawny” port from her vintage port collection. Our guess is that she would have gone with something like a Colheita (sometimes now called a Single Harvest Reserve). Good ones are sourced and bottled by many large and small wine producersand importers: this one from Fortnum & Mason would be typical.


    *For those interested in more detail about the different meanings of “dessert ” in the UK and North America, check this link: for more info about the general etiquette of the distinction between the sweet and dessert courses, click here.


    The courses served at Miss Sophie’s 90th Birthday dinner, and the recipes for them:

    Don’t know what all this is about? Click here for more info.

  • England: Bread Sauce

    A simple traditional sauce for poultry and game dishes. Bread sauce is possibly one of the oldest of British sauces still in use, having first appeared in medieval times.

    Ingredients:

    • 10 fluid ounces / 300ml milk
    • 5 fluid ounces / 150 ml heavy cream or double cream
    • 1 onion, peeled, studded with 6 cloves
    • A bay leaf
    • 3 ounces / 75 grams fresh bread crumbs
    • 1 ounce / 25 grams butter

    Put the milk, cream, onion, and bay leaf in a large saucepan. Bring to a boil.

    When it boils, turn off the heat and allow the mixture to stand for ten minutes.

    Remove and discard the onion. Add the bread crumbs; stir until the mixture becomes smooth.

    Stir in the butter. Season the sauce with salt and coarse-ground black pepper.

    Allow to cool. Serve with poultry or game.

  • Dinner For One: Miss Sophie’s Poulet rôti (Roast Chicken)

    Dinner For One: Miss Sophie’s Poulet rôti (Roast Chicken)


    "That looks a very fine bird…"

    Poulet rôti is what Cook Downstairs would most likely have written on the menu card she sent upstairs for Miss Sophie's approval before this whole business started. But at the end of the day, it's just a good plain roast chicken.

    Even though Miss Sophie's Cook is probably significantly younger than her employer, the two of them would both have lived their whole lives during the time when British cookery was still dominated by the name of Isabella Beeton. The original British "domestic goddess," Beeton's dictates on food and sensible housekeeping — as laid out in the fabled Mrs. Beeton's Book of Household Management — were taken practically as Holy Writ by whole generations of British kitchen-dwellers, from the mid-1800's until well on in the last century. A quick dip into the poultry chapter of Household Management makes it plain that there's very little that Isabella didn't know about the raising, keeping, buying, and especially cooking of chickens; and Cook Downstairs would certainly have followed Beeton's instructions pretty closely.

    For the plain roast chicken, Beeton gives straightforward instructions on how to proceed — from when to have the chicken killed (about two days before cooking) to how to clean and prepare it. The cooking instructions are interestingly a touch more involved than what we expect these days — the "grease it up, season it, stuff it or don't stuff it, and shove it in the oven" school of thought. But there's a reason for this.

    In Beeton's time, many great kitchens had dedicated "roasting stations" that we would now find astonishingly complex — full of machinery dedicated to keeping meat turning steadily and evenly, out in the open, in front of a clear hot fire. Isabella would have been aware that what happens inside a closed oven isn't really roasting, but baking by another name. She was, however, writing for the smaller household, where the cook would have had to make do with a regular oven. Beeton therefore worked to adapt some of the techniques of classic British open-fire roasting to her fowl recipes: specifically, the idea that the meat should be dredged with flour through the final stages of the cooking, to produce a crust that protects the meat from scorching, and adds a crisper-than-otherwise-possible contrast to the succulent flesh underneath the skin. The technique's described in updated terms below.

    To duplicate Miss Sophie's roast chicken:

    For each guest, obtain:

    • A small tender chicken of about 1000-1200g / 2 1/4 to 2 1/2 pounds. (Poussin is ideal for this if you can get it.)

    Have ready to season it:

    • Salt (preferably coarse)
    • Coarse-ground pepper
    • Several tablespoons of olive oil or clarified butter
    • Several tablespoons of flour for dredging the chicken
    • Optional: a lemon, split into quarters the long way

    You'll also need:

    • A strip of baking paper or baking parchment six inches wide and a foot long

    Wash the chicken inside and out and pat it dry with paper towels. Season it inside with about half a teaspoon each of coarse salt and coarse-ground pepper. If you're using the lemon, split it the long way into four pieces without cutting it all the way down to the base, so that the pieces hold together just at the bottom: tuck the split lemon inside the chicken. This lends a yummy fresh fragrance to the roasted chicken, and releases vapor that helps keep it moist.

    Preheat the oven to about 400° F / 200° C (375° / 180° if you have a fan oven). Rub the chicken well all over with olive oil or clarified butter. Put it breast-upward on a rack in a roasting pan. Season the top of the chicken with more coarse salt and coarseground pepper. Once on the rack, oil or butter the baking paper / baking parchment and tuck it around the breast end of the chicken to protect the breasts from cooking too soon and drying out.

    Put the chicken into the oven and roast for about ten minutes at the original heat. Then lower the oven temperature to 350° F / 175° C — again, just a little less for a fan oven — and continue roasting for another fifty minutes.

    Different weights and sizes of chicken will naturally roast at slightly different speeds, but by this point the kind of small chicken we're describing should be well on its way to being cooked. Now the finishing process begins. Take the roaster out of the oven, remove the buttered or oiled paper from the breast of the chicken, and baste the chicken's breast and legs with the pan juices. Now sprinkle the breast and the tops of the chicken's legs lightly with flour (the easiest way to do this evenly is to put a little flour in a sieve and tap the sieve with your hand while holding it over the chicken). Then put the chicken back in the oven for another ten minutes.

    After ten minutes, repeat the process: baste over the sprinkling of flour, sprinkle some more flour on, and put the chicken back in the oven for another ten minutes.

    You shouldn't need more than one additional repetition of this process before the chicken will be completely cooked, and should be a lovely golden brown. The surface of the breast where you've been flouring and basting the chicken may look a little frothy or bubbly: this is perfectly normal. (Beeton says to leave the chicken roasting until "nicely frothed and of a rich colour".) The chicken should be basted one last time without adding any flour and given a final five or ten minutes in the oven before you finish. If you feel it still needs a little more browning, increase the oven's heat to 400° F / 200° C for these last few minutes.

    When the chicken's done, remove it from the roasting pan to its serving plate and let it rest for at least ten or fifteen minutes before trying to carve it. The puffed-up breast and leg skins will collapse a little: this is normal too. When the chicken's done, joint and carve it, and serve it forth.

    Serve with gravy made from the pan juices and drippings. The classic accompaniment for roast chicken in Beeton's day would have been bread sauce. Click here for a recipe, if you like it (it's something of an acquired taste, which EuroCuisineLady has never acquired: she normally opts for roast potatoes).

    "I think we'll have Champagne with the bird…"

    If we're to adhere strictly to Miss Sophie's request, it means we can't use just any sparkling wine, but must serve the real thing from the Champagne region of France — now more than ever, since Champagne has succeeded in acquiring its AOC designation. Fortunately this restriction doesn't necessarily imply spending the Earth on a bottle: some excellent brands such as Moët & Chandon and Mumm's Cordon Rouge can be acquired without breaking the bank.


    The courses served at Miss Sophie's 90th Birthday dinner, and the recipes for them:

    Don't know what all this is about? Click here for more info.


  • Dinner For One: the recipes for the 90th Birthday

    Welcome! Here are our recipes for Miss Sophie’s 90th birthday celebration.

    Don’t know what all this is about? Click here for more info.

    Meanwhile, here’s “Dinner for One,” in two parts. Enjoy!