In 2010 or thereabouts, a tiny little cookbook came to us via EuroCuisineGuy’s Mum and immediately became a household favorite.
It was published in 1903 for what was the first generation of middle-to-upper class British housewives who couldn’t afford to hire kitchen staff, but still wanted to serve food suitable to a high-class household. These cooks were also beginning to come into possession of the first generation of true labor-saving devices — the initial gas and electric ranges, the first refrigerators — and were looking for recipes to take advantage of them.
So along came Harriet DeSalis, and with this group of readers in mind, wrote Savouries A La Mode. The cookbook was a huge hit — no surprise, when the recipes worked so well. Dipping into it, one finds recipes that make the mouth water and make the chronic cook (at least this one) itch to get into the kitchen and see how they turn out. It became the first of a series that went on well into the early part of the 20th century and sold hundreds of thousands of copies over numerous editions.
They’re all in public domain now, those original editions of Savouries and its sequels, which is what moved me to scan that first book and make it available . But the other reason I scanned it was so I don’t have to hunt down the cookbook proper, when the urge strikes, but can just load the PDF onto the iPad and work from that in the kitchen.
The other evening I was feeling like having some kind of snack, and it occurred to me to pull out the DeSalis and see if we had the ingredients for anything that looked nice. Paging through it, I ran into the Cheese Straws recipe, and the bells went off and I salivated on cue. Here’s the recipe.
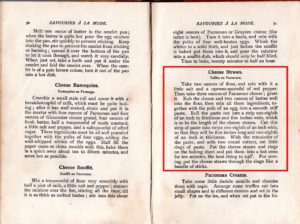
“Take two ounces of flour, and mix with it a little salt and a cayenne-spoonful of red pepper. Then take three ounces of Parmesan cheese: grate it. Rub the cheese and two ounces of butter well into the flour, then mix all these ingredients, together with the yolk of an egg, into a smooth stiff paste. Roll the paste out into a strip one-eighth of an inch in thickness and five inches wide, which is to be the length of the cheese straws. Cut this strip into strips one-eighth of an inch wide, so that they will be five inches long and one-eighth of an inch in thickness. With the remainder of the paste, and with two round cutters, cut little rings of paste. Put the cheese straws and rings on a baking sheet and put them into a hot oven for ten minutes, the heat rising to 246 degrees. For serving, put the cheese straws through the ring like a bundle of sticks.”
So. My first thought: God that looks fiddly. But never mind. Also: Forget about the little rings, this isn’t going to be a dinner party. The second (okay, maybe the third) thought: We don’t have any Parmesan: only Cheddar. …Like I’ve ever let that stop me. (An old allergy put me off Parmesan early, and these days, though no longer allergic, I avoid it.)
So I went forward with the same amount of Cheddar, knowing that the mixture would be a little wetter due to the Cheddar’s extra moisture, and I’d need to compensate with slightly longer baking. What I learned in the process of making these:
- The whole thing can be done in the Cuisinart / Magimix, which simplifies matters considerably. I grated the cheese separately on a microplane grater, then buzzed the flour/cayenne mixture together using the steel blade in the small bowl of the Cuisinart; then dumped its contents into the big bowl, whizzed everything together with the cheese, added the two egg yolks and pulsed until the whole business gathered together. If you’re going this route, don’t overdo the pulsing, as you don’t want the mixture to toughen up.
- 1 egg yolk wasn’t enough for our local flour to cohere: I wound up using two.
- I’d never heard of a “cayenne spoon” until I saw this recipe. There are pictures of them at Google (click here) and you know what? They’re all too small for me. We like our cayenne around here. I put in a teaspoonful. (Peter noted that you could probably get away with using chili powder if you were of a sensitive disposition.)
- 1/8 inch is indeed very fiddly. I wound up cutting my straws / sticks to more like 1/6 or sometimes 1/4 inch, and that worked out fine.
- I put baking parchment under these to make sure they wouldn’t stick. It turns out to be a good idea, as melting butter bubbles out of them at the edges when they’re baking.
- Ten minutes was way too long a baking time, and the oven temperature takes some fiddling with as well. I have no idea what Mrs. De S. means by “rising to…”. I wound up putting these in the oven at 170 C / 350F for about 5 to 7 minutes (as our oven retains heat during multiple bakes, so they needed less time as I went on). Your mileage will almost certainly vary. Experiment with a small batch to see how you get on.
…And that’s all there is to it. The straws were incredibly delicate and buttery due to the very short pastry — but the cheese is great in them and the cayenne gives them a terrific kick. The whole bake lasted through about twenty minutes of the first Hobbit movie. Peter tells me they work as well with beer as mine did with that red wine.
Try them and see how they work out for you. And mind your baking times, as the Secretary and I will disavow any knowledge of your actions if the sneaky little creatures burn to a crisp between one minute and the next. (Like my first batch did.) Do a small batch first and watch them like a hawk. Save


